Running Economy: Making it Look Easy Part 1

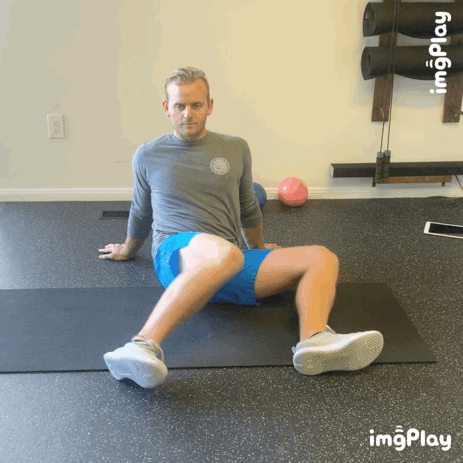
With so many people finding an escape from their quarantine by running on their treadmill or using a jog as the only acceptable reason to leave their house I felt it necessary to help you run properly. Obviously we run with our feet and legs but when done efficiently, running is a full-body movement. Upper body joint angles and posture are just as important as foot strike and knee drive, so much so that many times lower body mechanics improve by changing upper body mechanics.

Much like I do with my clients who do a Running Economy Assessment, I will help you run with better form little bits at a time. Once you perfect one area of your form you can move on to the next. This will help us figure out if you have strength or mobility imbalances, need to practice drills to improve your form, or possibly you’re wearing the wrong shoes.

I choose to start with the most basic part of your form which is the hand position. There are 3 hand positions I recommend and there is a specific reason for this. For the sake of keeping things simple, with these hand positions we recruit a longer muscle which spans from the fingertips to just above the elbow joint on the medial side(inside). The more muscles you can use when driving the arm back, the more efficient you will be, and less fatigue will occur.

Position 1: The Fist

IMB_Rxg1wh.gif

This is the proper adaptation for runners who like to run with a fist. While your hand shouldn’t be squeezing tightly, just slightly firm. This position is effective at keeping the hand in position with minimal effort as the thumb holds the folded fingers in place. It is essential that when holding this position, the middle fingers are not bent. The soft pad under your nail should be pressed into the center of your palm, not “digging” into your palm.

Position 2: Stack and Key

IMB_DLzbnI.gif

This is my preferred hand position and anyone who has been taught to act like they are holding potato chips can relate to this position. I call it the stack and key because you will stack digits 3-5 in the palm while the thumb and pointer finger are positioned like you are holding a key. I especially like this hand position because my hands to get hot and sweaty when I make a fist, but I don’t feel comfortable with position 3. As a side note, most people will not feel comfortable with any of these positions when you first start out, but over time, and usually not very much, they become natural positions that you don’t even think about. These changes are such difference makes in efficiency that you will feel the shoulder blades squeeze back and open up the chest, creating the proper posture for efficient running form.

Position 3: The Angle

IMB_c2Dtyi.gif

This is the hand-position for open fisted runners. Those who straighten out their hand like they are doing a karate chop or let the wrist and fingers flop on over the place. It is a small change that creates the same big results as the previous two positions. All you need to do create a rigid angle of about 90degrees through the metacarpophalangeal joint, or knuckle.

Start by trying these hand positions and which one feels the most natural to you. Then consistently remind yourself to put your hands into position through out your run. You might feel fatigue in the hands at first but that will go away quite quickly. Good luck subscribe to receive the next article on Running Economy.

Stay Loose and Limber Without Doing Yoga

It is no secret that yoga is an incredible tool for improving muscle flexibility and increasing mobility through all joints. Vinyasa flows are amazing for opening the hips, increasing thoracic mobility, and improving posture by decreasing anterior muscle tension in the torso and posterior muscle tension, like the hamstrings and calves. Unfortunately, yoga is not for everyone. No matter how hard I try, I cannot get into a habit of doing yoga I always feel refreshed and loose after I’m done, but I just can’t seem to do it consistently. This isn’t uncommon neither. We have an amazing yoga instructor, Bri Stoecker of Bri Marie Yoga, and when I tell our members who need it the most that they should attend yoga 1-2x per week, they react like I’m asking them to run a marathon, without training, right now! Like most things, it seems the people who need it most, are the most reluctant to do it. Like I said, I’m in the same boat, I can’t seem to make it habit. Well, luckily for us, there is another solution, but it comes with a catch. We can do mobility exercises, which will help loosen the joints by working through range of motion, but first and foremost the most important thing is the catch, consistency. You spend the majority of your day or your active hobby doing the same movement over and over, the only thing that will overcome high volume of reps is consistency. Create a habit and stick to it, either 3 days/week doing 45 minutes of mobility work, or 15 minutes daily. Start with these 5 on a daily basis. There is no better time than quarantine time to form a new, healthy habit,

  1. 90-90 Hip Rotations

15 reps per side, pausing with both knees touching the ground. Keep shoulders down, away from the ears

15 reps per side, pausing with both knees touching the ground. Keep shoulders down, away from the ears

2. Half-Kneel Torso Twist

15 Reps per side, pushing your range-of-motion without compromising form i.e. knee stays over heel

15 Reps per side, pushing your range-of-motion without compromising form i.e. knee stays over heel

3. Half-kneel torso bend

15 bends to each side, pushing range-of-motion without compromising form i.e. rear hip stays over rear knee

15 bends to each side, pushing range-of-motion without compromising form i.e. rear hip stays over rear knee

4. Standing Windmill

15 reps per side, keep arm point straight up, squeezing the shoulder blade into your spine. Try not to bend knees or sliding hips laterally to engage a hamstring stretch

15 reps per side, keep arm point straight up, squeezing the shoulder blade into your spine. Try not to bend knees or sliding hips laterally to engage a hamstring stretch

5. Step-Back Groiner w/ Twist

15 reps per side, keep weight in the front heel, hips low, shoulder down, and squeeze rear gluteal muscles to create a hip flexor stretch

15 reps per side, keep weight in the front heel, hips low, shoulder down, and squeeze rear gluteal muscles to create a hip flexor stretch

TRX exercises every golfer should be doing

Whether you’re a scratch or your just trying to get through a round without losing a ball, these 3 exercises will help create stability and consistency in your game.

  1. Russian Twist

    A combination of dynamic abdominal rotation and stabilization of the spine and hips is exactly what a golfer desires. This exercises accomplishes both. To increase difficulty, keeps your elbows locked and the hands as far away from your chest as possible. Add a squat and truly make this an explosive total body exercise.

  2. Pistol Squats

    While anyone can benefit from this well-known and well-hated exercise, golfers are especially the beneficiary of this single-leg exercise. Build stability in your hips by using your gluteus mediums tonmaintain square hips while balancing your bi-lateral leg strength. Increase difficulty by standing over your foot rather than leaning back, and use your handles for balance over leverage when possible.

    Add a stork-dive between repetitions to increase the need for stability

  3. Body Saw

    This is one of those exercises that looks so simple you know it’s gotta burn. Only a short range of motion is needed to feel the effectiveness of this plank variation. Be sure to keep your tail-bone tucked and pulling your belly button to your spine as you push and pull your body like a saw.

Shred your legs with this forgotten training tool

It seems that only elite athletes and exercise masechists use this tool regularly and enjoy it. The benefits are numerous and include being cheap, accessible, and efficient. What more could you want out of a training device. What’s great about them is you can actually find many of them for free so while owning one is great, owning multiple is awesome. What is this great tool?

Hills!

They come in all shapes and sizes. They are found in most neighborhoods around the world. If you ask any Kenyan or Ethiopian runner they will most definitely speak with both respect and admiration for their favorite training hill. Hills aren’t just for runners though. We use hills all the time to straight lateral speed and explosiveness in young athletes. We also use the incline to challenge our members to build their gluts and hamstrings doing lunges and broad jumps up the iconic Laurel St Hill that our studio resides on. No other tool is will force your heart to beat faster, legs to shake with exhaustion, get results as quick as finding a big steep hill and owning it!